Modeling


Feragie (PTT) 

 The given model of the giraffe is quite manly!!! So to come up with a model of Feragie we made following changes:


-         We used a torus and cylindrical structure to make horn. Torus is put on the end of cylinder to realize the horn.


-         We performed some texture changes on giraffe. The textures of body, eyes and eyelids are changed.


-         We added ribbon on the tail. Description of modeling the ribbon is given below. And a sphere is used to realize a nose.


Ribbon (PTT) 

A box and cylinder is used to make a ribbon. We converted both to editable mesh. Then box is edited by adopting vertices to the shape shown in image. Some vertices on the front faces of the box are modified to give a bump in the ribbon. Then we get the basic shape for the ribbon. At the joining of the two lobes of the ribbon we use the cylinder. We apply Mesh Smooth modifier to them to have a nice structure.


 Grass (SJ) 


Ground is modelled using quad patch. To make bumps in the ground we used Displace modifier. In Displace modifier one can use noise as a map to generate the same effect. However here we used a bitmap image to have bumps at desired places in ground. Image used is shown in left.

Bottom image is used to make bumps in ground using Displace modifier’s bitmap option. And middle image is used to make the path on ground. This is realized using Material Editor. In Material Editor, we created a Blend material and used grass and grass-dirt texture with mask as the image shown in left (middle). Important thing to note here is that the path is made over a blank image rather than on the same image used in Displace modifier, otherwise it will generate grass-dirt whenever there is black colour.


Tree (SJ)


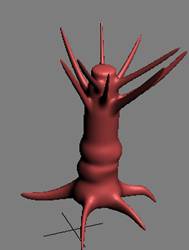
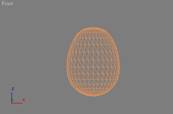
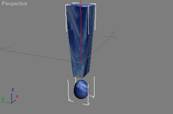
Cylindrical shape is base of our tree model. Then we use Edit Mesh modifier to make root and branches in that cylindrical shape. Bevel Polygon is handy tool to achieve this. Utilizing above procedure we make different types of trunk structure and one of them is shown here.


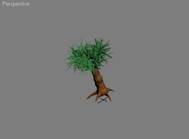
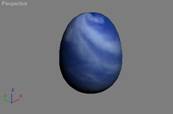
There are several wood textures available in Material Editor’s MTL Library. We used separate texture for each tree. To smooth the structure, we used Mesh Smooth modifier. To apply leaves or whatever one wants, one has to detach branches from the trunk structure. So first all the branches are selected and then they are detached. This function is available in Edit Mesh modifier.


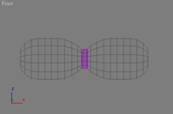
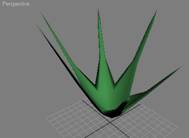
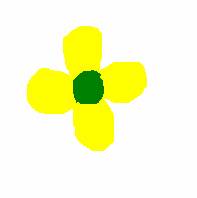
We created a leaf type of structure from a box. Four sides of box are extended using bevel polygon method. We used Edit Mesh and Mesh Smooth modifier to achieve the structure shown left.
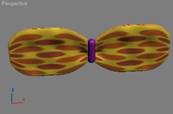
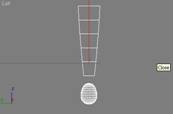
 

These leaves are scattered over branches. For this purpose, we created Compound Object scatter while leaves are used as source object and detached branches are used as distribution object. 200 duplicate copies are scattered over the branches.


Flower (SJ)

Flower model is created using Quad Patch. Technique is quite similar as used in Ground Model. Here we also used Displace Modifier to create a sense of bump on the surface. Here the material creation is important. We used above images to create the material. The left image is used for bump and diffuse map while the right one is used for opacity and glossiness map. The material is made 2-sided.


Ball (PTT) 

We used sphere to model a ball. We then apply Edit Mesh modifier on that. Now using soft selection with top vertices we change the scale of sphere non-uniformly. We used texture from the available library in 3ds max.


Exclamation Mark (PTT) 

To create exclamation mark we used box primitive. Then using Taper modifier we give it the shape as shown in the image. Ball created in previous step is used with the obtained structure.