ProtecViz DIY:
a do it yourself protection visor
Instructions about ProtecViz
Information about Inria
Inria (National Institute for Computer Science an Automation) is a french public research institute in the field of Numerical Technology.
Inria aims to carry out techmological developments and experimental systems (article 2 of the decree n°85-831 ont the 2nd of august 1985).
Name and Description of the prototype PRODUCT
ProtecVIz is a tutorial allowing to make an experimental visor prototype to protect the face.
Warning - Caution
ProtecViz is a tutorial about the making of an experimental prototype that didn't get any official certification .
This is not a medical equipment nor an accredited protection, it has no diagnosis, treatment or cure purpose, and can't prevent from wound nor disease.
ProtecViz must not be made nor used by children under 18.
ProtecViz must be made and used by adults over the age of majority, capable and sane..
ProtecViz must be used in an environment respecting official health instructions formulated by the french government (https://www.gouvernement.fr/info-coronavirus).
Some tools listed for the making of ProtecViz can involve the use of specific protections, the user had the responsability to exercise normal safety precautions when using tools.
Additional Use Instructions
Don't use the visor made thanks to the Proteciz tutorial:
- when driving any type of vehicle
- when using devices requiring a specific security or protection equipment.
Maintenance Exclusion
Inria doesn't provide any additional service to the provision of this tutoria.
Contact
Laurence BOISSIEUX (laurence.boissieux@inria.fr) |
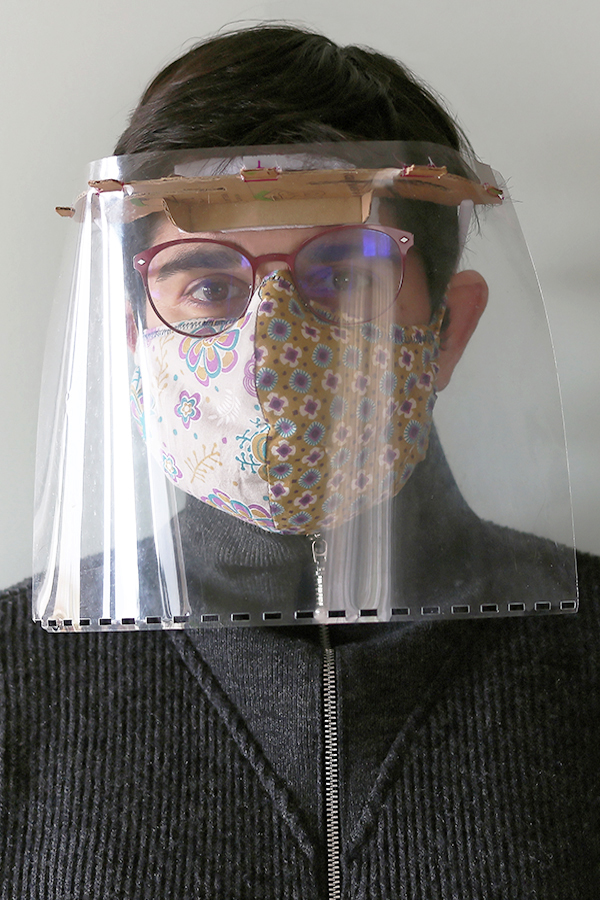
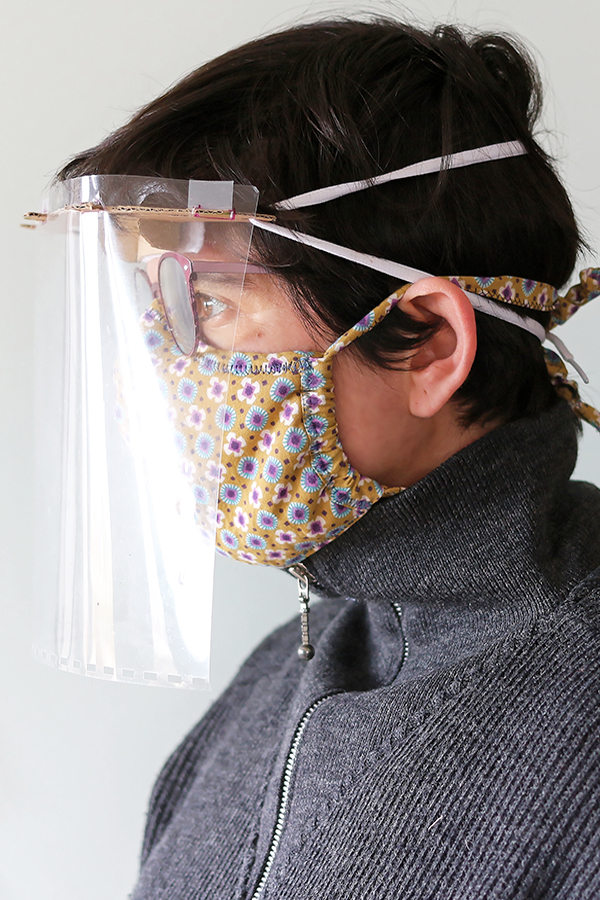
As part of the fight against Covid-19, here is a tutorial explaining how to make a home-made protection visor for the top of the face.
CAUTION: this system comes in addition to a mask and DOESN'T AVOID respecting the DISTANCE MEASURES.
|
Required Supply and Tools
Supply
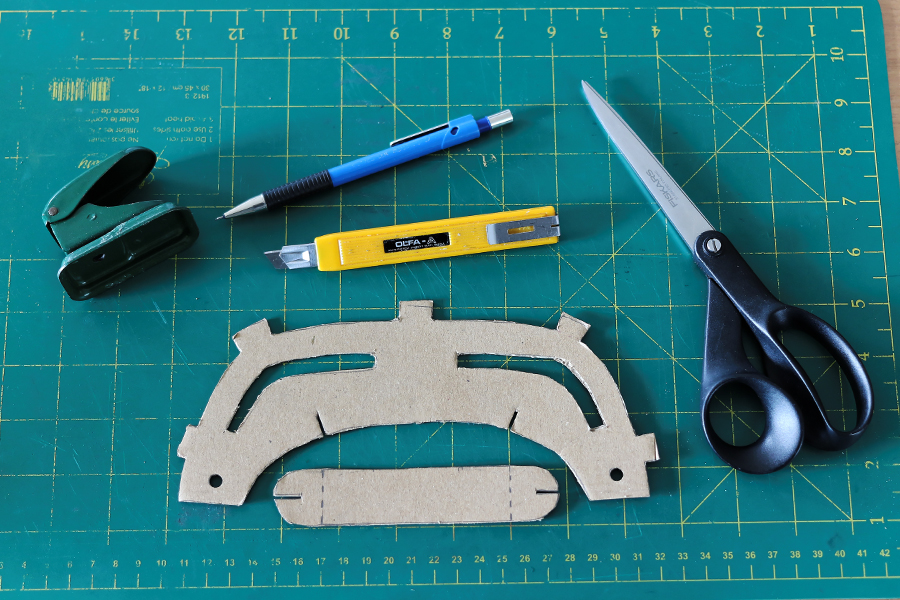
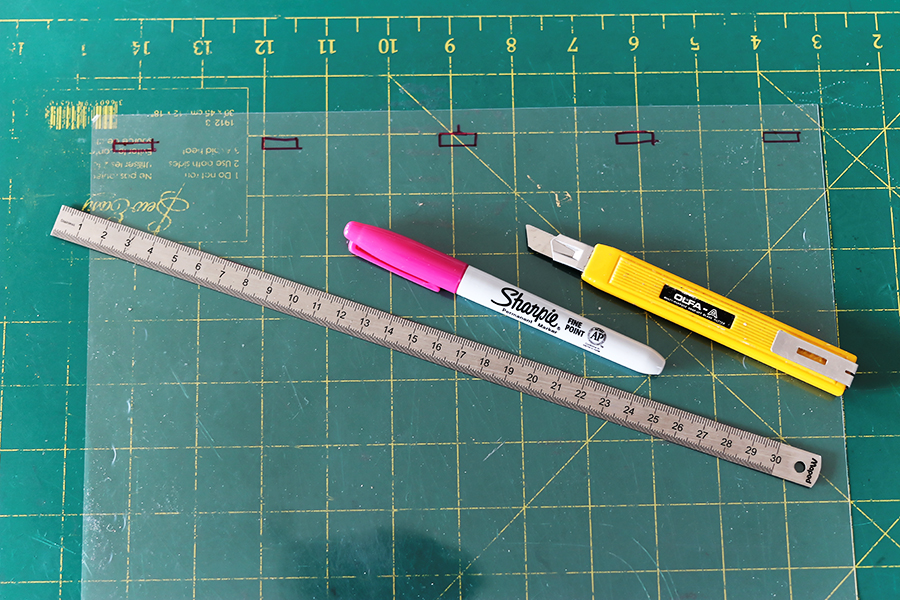
Tools
- A pair of scissors
- A cutter
- A hole punch
- Possibly adhesive tape and glue
|
 |
Making Steps
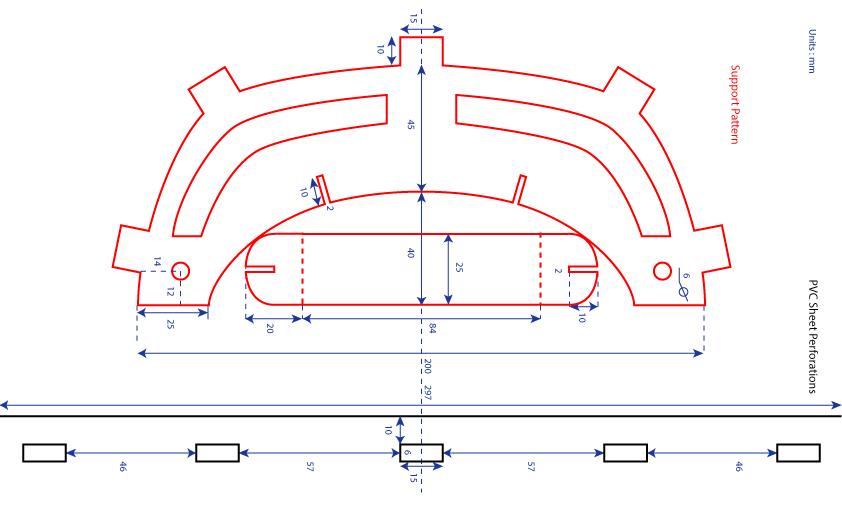
- Download and print patterns on an A4 sheet of paper, keeping the original scale.
|
 |
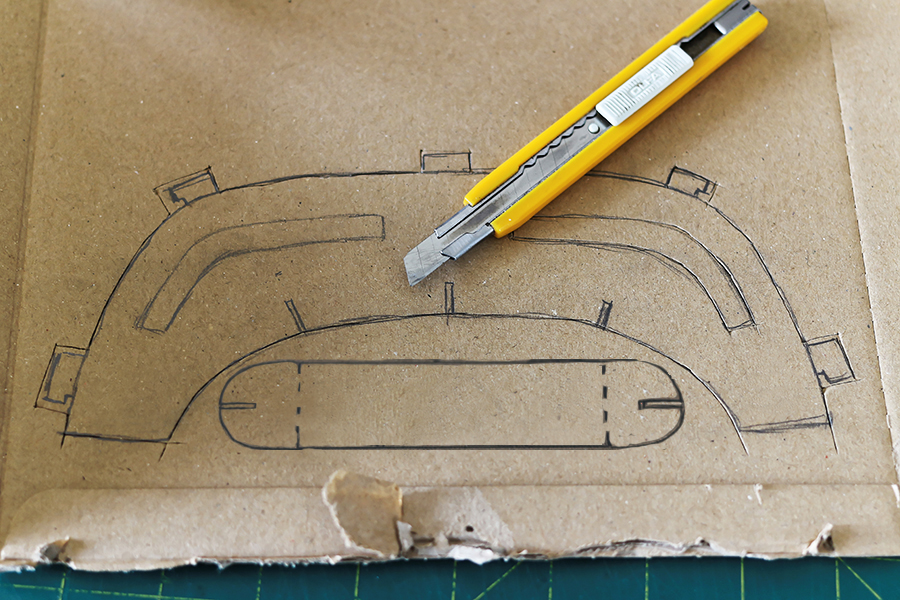
- Cut support shapes and use it as a pattern to draw on the cardboard.
This step is not illustrated : no available printer at home !
|
 |
- Cut the support.
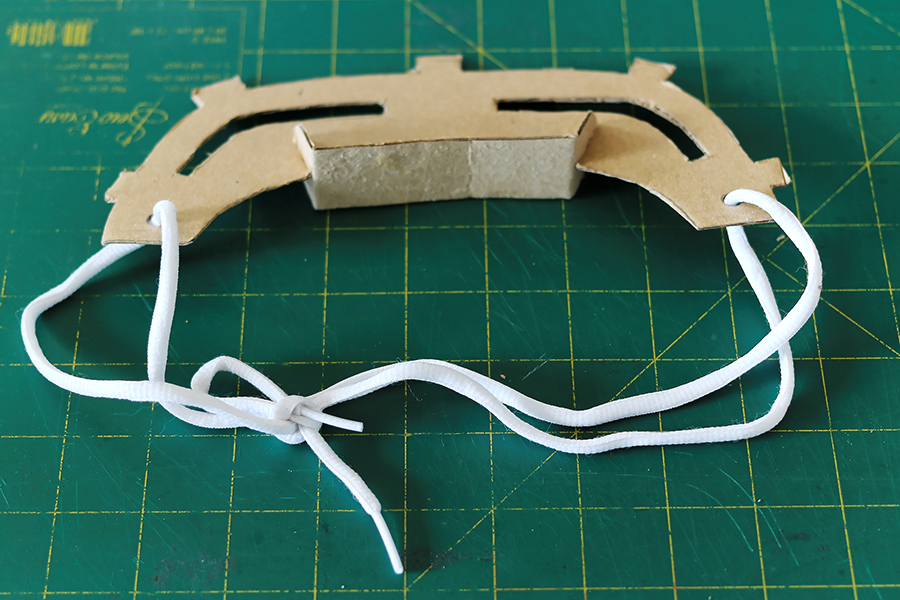
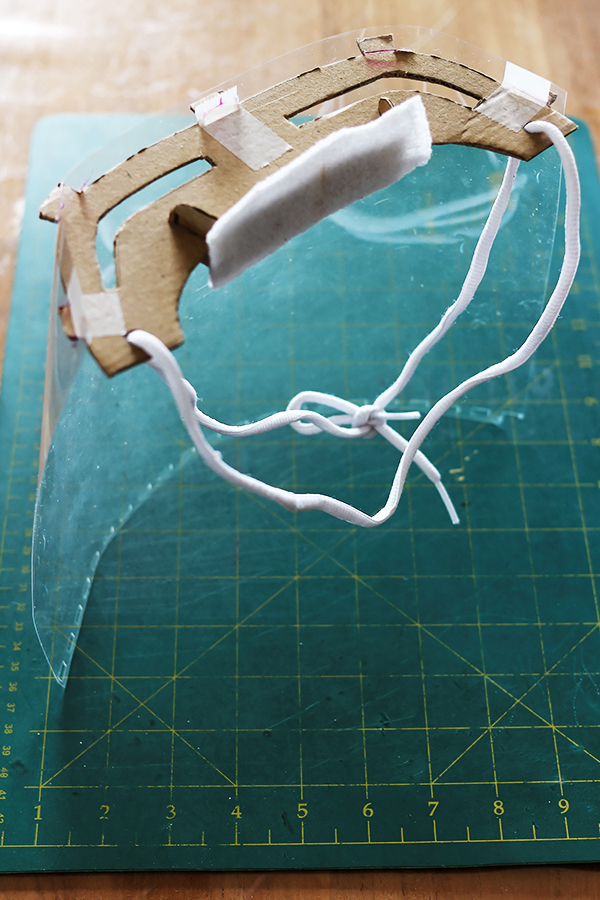
- Punch 2 holes in the support extremities, the shoelace will pass through it.
|
 |
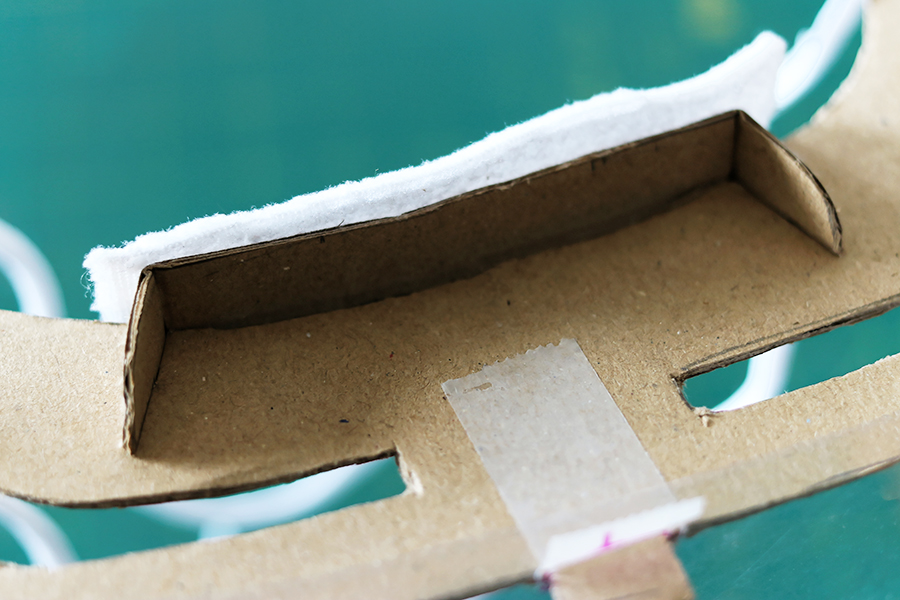
- Bend the 2 stabilization tongue extremities along the dotted lines copied from the pattern, and insert the tongue in the support through the notches. If the cardboard is thicker than 2 mm, enlarge the notches.
- Pass the shoelace through the extemity holes.
|
 |
- Cut fixing holes in the PVC sheet according to the patttern.
|
 |
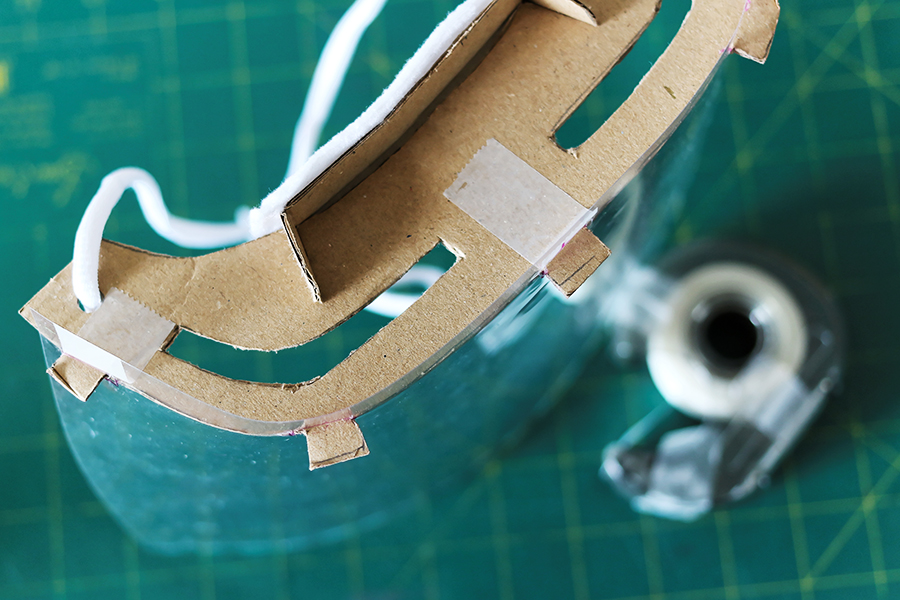
- Assemble the PVC sheet on the support (pieces of adhesive tape can help maintain both together).
|
 |
- Glue the fleece piece onto the tongue or just slide a bent handkerchief piece between forehead and visor: the aim is to absorb any sweat.
|
 |
  |
  |